
Transforming Images in PowerPoint: Beyond The Basics
This edition of Beyond the Deck (BtD) delves into the nuanced art of PowerPoint imaging. In the world of presentation design, every slide acts as a chapter in a larger narrative, with each image serving as a pivotal character that enhances the visual relevance of your message. The transformation of images becomes a strategic method of enhancing your narrative and persuading your audience.
Background vs. Focal Point: Setting the Stage
Before we delve into techniques, it's essential to determine the role of your photograph in the slide. Is it a vibrant focal point or a subtle background? This decision shapes how the image will support your story and points to the adjustments needed to create this visual expression:
As a Background: Consider reducing opacity, applying a color overlay, or adding a slight blur. This ensures that text or other elements remain the superstars of your slide.
As a Focal Point: The image should be crisp, clear, and compelling, drawing the viewer's eye and conveying your message powerfully.

Exploring the Art of Image Bleed
Partial Bleed: The image extends partially, creating a dynamic yet balanced layout. Perfect for combining with text or other elements.
Full Bleed: The image covers the entire slide for an immersive experience. It's ideal when the image itself carries your message.
Blended ‘Full Bleed’: A technique where an image partially bleeds over, blended seamlessly with overlaid shapes matching the slide background to achieve the effect of a full bleed image.
How to create the effects:
A partial bleed involves cropping the image and repositioning it within the crop to achieve optimal placement.
The full bleed often requires extending an image beyond the edges of the slide’s borders and then cropping off the ‘extra’.
The video to the right demonstrates how to achieve a blended full bleed.

Partial Bleed

Full Bleed


Blended Bleed
Expanding your visual vocabulary
Asymmetry: Challenge conventional symmetry by placing your image off-center. This approach draws the eye and creates a dynamic visual flow. We read from left to right. By positioning an image (or image focal point) in the right third of your slide, a compelling narrative or key points will be seen first, followed by the visual support.
Centered Focus: When your image itself is the message, let it take center stage. A centered, full-bleed image creates a powerful impact, ideal for introductory or conclusion slides. This technique works exceptionally well with high-quality, evocative photographs that encapsulate your message like this team meeting taking place at Sea World!
Precision in Image Sizing and Cropping
Repositioning Within the Crop: After cropping an image, keep your cropping window open. Then, move your image within the crop frame to find the best placement.
Precision Cropping: Adjust the cropping dimensions and/or the offset position of the image within the crop by using the Format Picture pane like the one on the right (Fig 1). Once you’ve got the dimensions perfect, then increase or decrease the image size and adjust the position as needed.
Pro tip: Tired of looking at stretched photos? ‘Lock the Aspect Ratio' while resizing to maintain uniformity (see Fig 2).
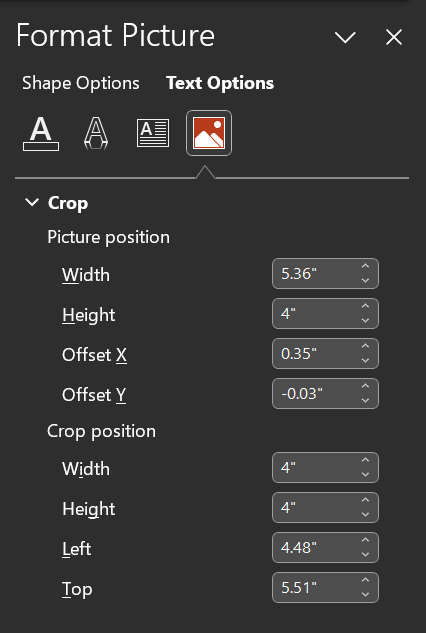
Fig 1

Fig 2
Remember Last BtD? Imaging Effects
The ‘Artistic Effects' commands are available any time a photograph has been selected. They range from ‘Plastic Wrap’ to ‘Watercolor Sponge’ and everything in between. One practical application is to create a playful version of an otherwise cerebral image as you see in the section divider on the right.
The Before image on top is the original. After-1 has been adjusted using the ‘Pencil Sketch’ effect and the After-2 image on the far right is one way of using this image within a deck.
Before
After-1
After-2
Beyond
As the landscape of presentation design continues to evolve, mastering the art of image placement and transformation emerges as a crucial skill set for any designer. Remember, each image you choose has the power not just to complement, but to significantly amplify your message and connect with your audience on a deeper level.

Thank you for joining me 🤍!